I've been seeing these glass blocks all over the place and people have done the cutest things with them. So when I came across them, on sale, at my LSS I thought I'd see what I could do with it.
The snowmen are cut out of the printable vinyl, using the Snow Angel Imagine cart, and they were cut at 5 in. The letters are are cut at .50in using the Gypsy font and welded together. I added glittered snow and snowballs to the glass block and tied a fancy ribbon , which I found at Michaels, around it . I found the stand at the same LSS, Crafts Direct, that I the glass block came from.... on sale also! Gotta love sales!!!
The saying reads "Snowmen fall from heaven unassembled", its kinda hard to read in these pictures, that's why I posted in both backgrounds. It was a quick and easy project, it would make a great present but... I think it will stay with me:)
I'm entering this in to a few challenges:
Whimsical Design - Christmas/ Winter project with glitter
Terrific Tuesday Challenge - Christmas
Wacky Wednesday -- Christmas
Thanks for looking and Happy Holidays!!
Mary
Friday, December 9, 2011
Thursday, December 8, 2011
Stampin' Up Christmas Cards
I am a fairly new Stampin' Up demonstrator and I recently started up a monthly card club. We meet at my house on a Sat. afternoon, I like to refer it to as our "Ladies Time-Out", and with my SU product I show them how easy it can be to make your own cards. I have snacks, a few giveaways, and everyone leaves with at least 4 cards, that they made themselves, and another little project I've come up with. I usually have between 8-10 people attend and so far its been a blast, it's great to be able to share something you love with others.
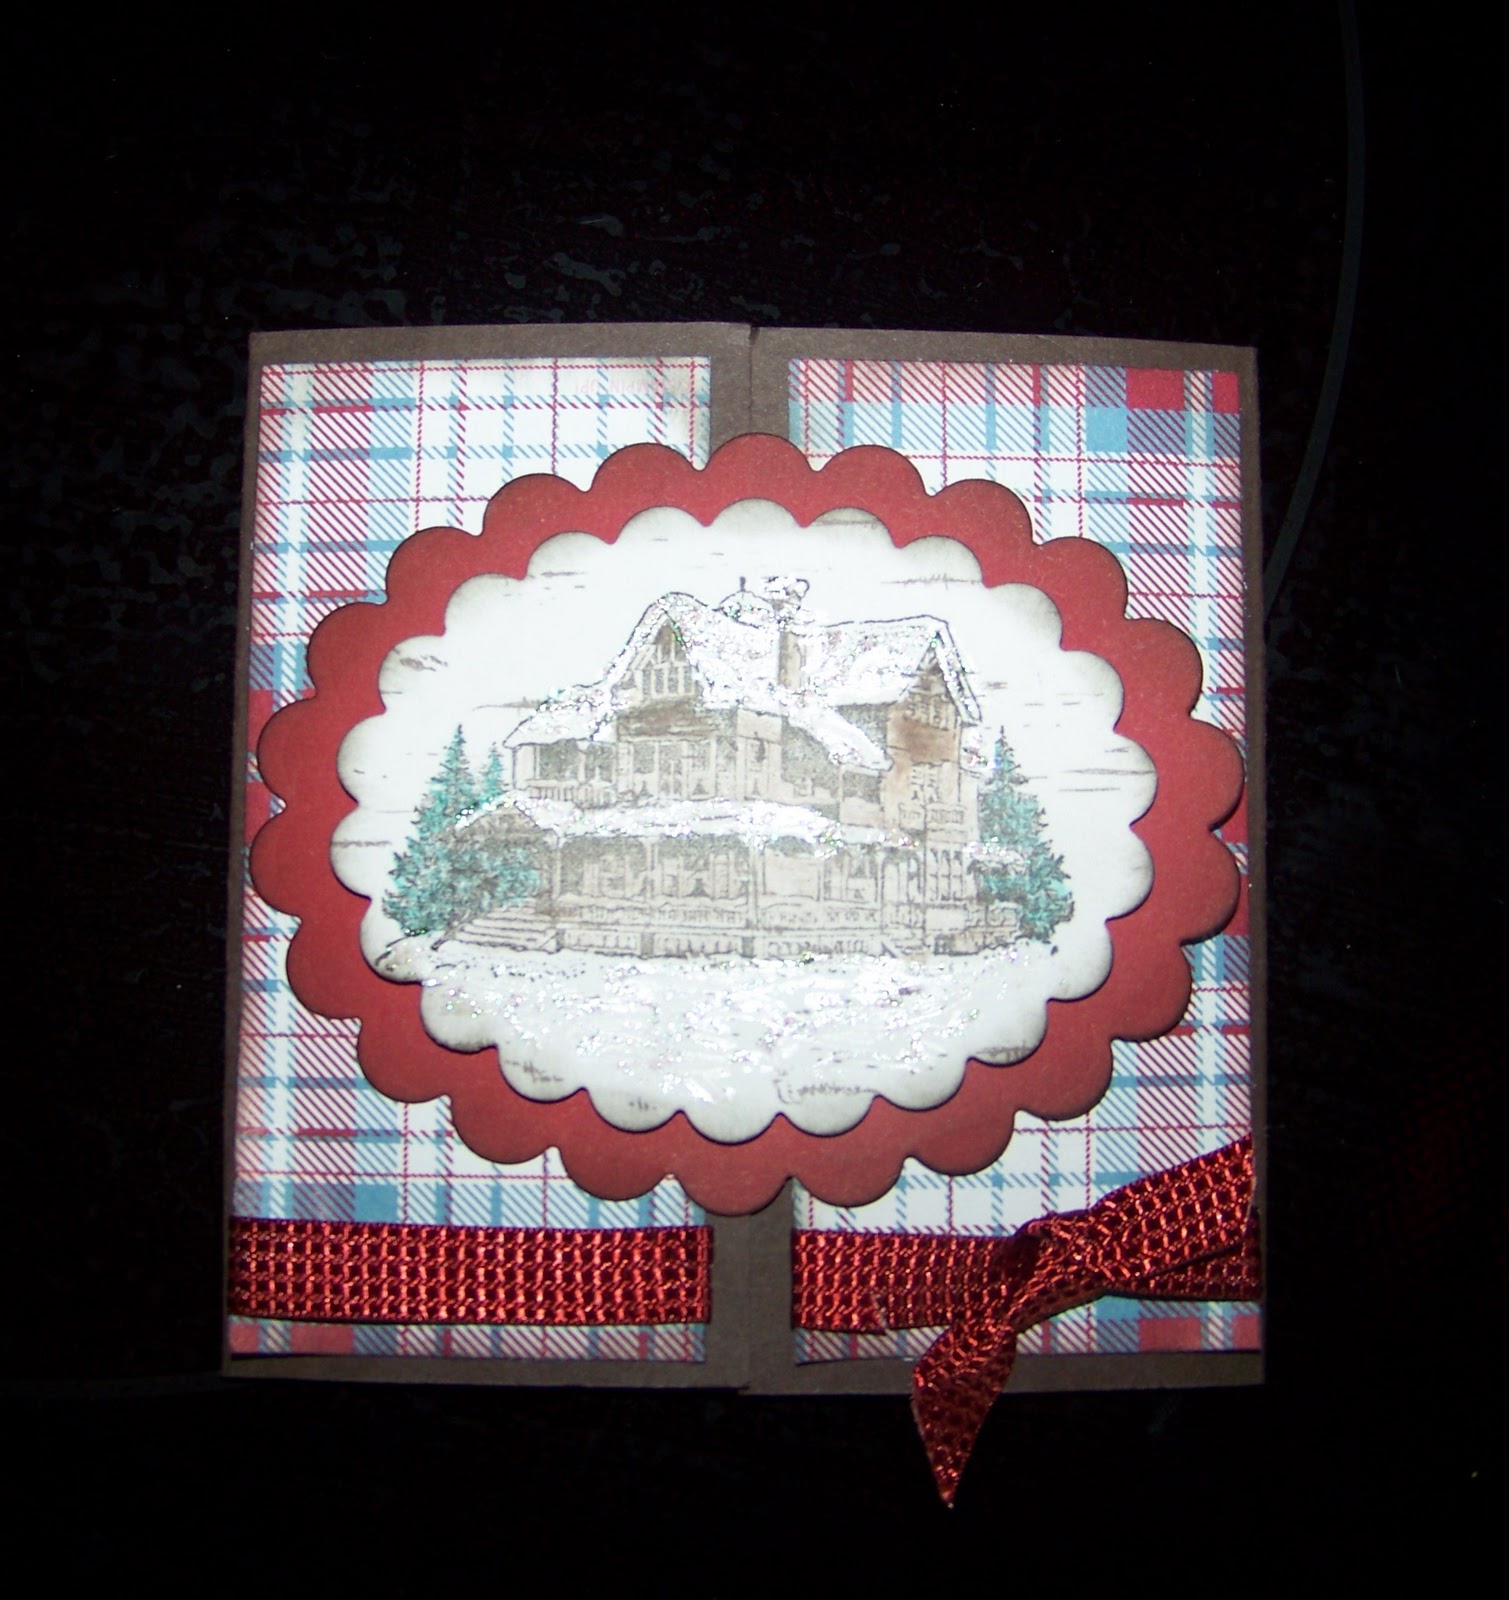
These are the cards we made last month, they just happen to be the Christmas cards I'm sending out this year.
The first 2 cards are from my favorite stamp set and designer paper.
Supplies:
Christmas Lodge Stamps
Frostwood Lodge
Cardstock & Ink - cherry cobbler, early expresso and olive green,whispering white
Dazzling Detail glitter
Water Color pencils
Viva Decor pens - bulbs on tree
Bakers twine for the bow
For this card supplies used:
Delightful Decorations stamp set
Ornament punch
Cobbler Red, Early Expresso, Very Vanilla
Basic Pearls embellishments
Red Cobbler satin ribbon
Mary
Wednesday, December 7, 2011
Redneck Wine Glasses
This weekend is our annual ladies Christmas party. It was started many years ago by my husbands grandma, Marge. Grandma Marge passed away 2 years ago but it was decided to continue on in her memory. It also was decided that every year there would be new hostesses and guess who was chosen for this year.... 2 of my SIL's, a family friend, and I!! We chose a wine theme so the games, prizes and even the gift exchanges all revolve around wine. I came across this idea at our LSS, Crafts Direct,.and just thought this would be perfect for the party. You see we are all from "Up Nort" , "You Betcha", Dont'cha Know" ... and I must not forget
"Uff-DA!!" LOL These Redneck wineglasses will be prizes for our guests
They were easy and very inexpensive to make. The jars are old canning pint size canning jars and the stems are small vases that I found at Savers for .69 ea. Candlestick holders can be used, but I could not find any of those but I thought these worked great. I filled one vace with glitter snow flakes and the other I used MS glitter. I then glued the jars to the vases using E6000 glue and let them fry overnight. I then attached the buttons, ribbon and bakers twine. For the lettering, I used the Mickey Font cartridge cutting the letters at .75in and the numbers at .50in. Everything I used was from my stash excepted for the vases.
And there you have it... beautiful RedNeck Wineglasses
"Uff-DA!!" LOL These Redneck wineglasses will be prizes for our guests
They were easy and very inexpensive to make. The jars are old canning pint size canning jars and the stems are small vases that I found at Savers for .69 ea. Candlestick holders can be used, but I could not find any of those but I thought these worked great. I filled one vace with glitter snow flakes and the other I used MS glitter. I then glued the jars to the vases using E6000 glue and let them fry overnight. I then attached the buttons, ribbon and bakers twine. For the lettering, I used the Mickey Font cartridge cutting the letters at .75in and the numbers at .50in. Everything I used was from my stash excepted for the vases.
And there you have it... beautiful RedNeck Wineglasses
Friday, October 28, 2011
Flowers for Katie
Last Sunday my 22 yr old niece, Katie, had a Brain Aneurysm that burst, by the grace of God, she was saved, and is still with us. She will be in ICU for at least 2weeks and is expected to make a full recovery....God is Good! In the ICU they are not allowed to have real flowers so I thought i would make some up for her. I'm going down to visit her today so last night I whipped this bouquet up to take down to her.
Red is her favorite color so I made sure there was alot of red. I used the Flower Shoppe, Forever Young, and Enjoy the Seasons cartridges. I hope she likes!
Please keep Katie in your prayers, she's got a long road ahead of her.
Thanks for looking!
Mary
Red is her favorite color so I made sure there was alot of red. I used the Flower Shoppe, Forever Young, and Enjoy the Seasons cartridges. I hope she likes!
Please keep Katie in your prayers, she's got a long road ahead of her.
Thanks for looking!
Mary
Tuesday, October 18, 2011
Male Bday card- CTO challenge #35
It's time once again for a new challenge at Celebrate the Occasion. We are being challenged this week to make a male B-day card and it must contain metal. I wanted to try something different so here is what I came up with.
I've heard of people embossing pop cans so that is what did. I cut up a can and used a 3.75x 3.25 piece of it and put it though the cuttlebug with a Robotz CB folder. I gotta say, I really love the result!
The products I used for this card:
StoryBook Cartridge
DCWV Cardstock
Stampin'UP- Black & Whispering White cardstock
Stampin'Up - "Perfect Words" stamp set
Stampin'Up - black ink
Fiskars "Happy birthday" stamp
Robotz CB folder
Viva Decor silver liner
Diet Mountain Dew can from my recycling bin
The metal screw brads, wire and orange paper are from my stash
Cards for men are always such a challenge, so are you up for it?? First, head on over to CTO and get inspired by all the super talented designers, and then start creating. You have til Sun. the 23th to post your project. We would love to be inspired by you :)
Thanks for stopping and have an awesome day!!
Mary
I've heard of people embossing pop cans so that is what did. I cut up a can and used a 3.75x 3.25 piece of it and put it though the cuttlebug with a Robotz CB folder. I gotta say, I really love the result!
The products I used for this card:
StoryBook Cartridge
DCWV Cardstock
Stampin'UP- Black & Whispering White cardstock
Stampin'Up - "Perfect Words" stamp set
Stampin'Up - black ink
Fiskars "Happy birthday" stamp
Robotz CB folder
Viva Decor silver liner
Diet Mountain Dew can from my recycling bin
The metal screw brads, wire and orange paper are from my stash
Cards for men are always such a challenge, so are you up for it?? First, head on over to CTO and get inspired by all the super talented designers, and then start creating. You have til Sun. the 23th to post your project. We would love to be inspired by you :)
Thanks for stopping and have an awesome day!!
Mary
Tuesday, October 4, 2011
Fight Like a Girl!! CTO challenge #33
Hello and welcome to another great challenge at Celebrate the Occasion. Our challenge this week was to create a project for Breast Cancer Awareness month.
This is the card that I came up with.
The products I used:
Everyday PaperDolls Cartridge - 3.25in
Blossoms Imagine Cartridge - pink paper
Stand & Salute Cartridge - .50in pink ribbon
Gypsy Font Cartridge- .75 in
Spellbinders Nestibilities- scallop oval
Cuttlebug Folder
Viva DecorPearl Pens
We R Memory Keepers Pink Floss
Stampin'Up Whispering White cardstock
Stampin'Up Dimensionals
Peach keen EveryDay Character Faces
Thanks for stopping! Make sure you head back to CTO's blog and check out the rest of the DT's fabulous creations.
I'm also entering this in a few other challenges:
Link Up for Pink Linking party
My Sheri Crafts - Think Pink
And remember ladies... Do your monthly breast self-exams and get in for your yearly Mammograms!!!
Have a great day!
Mary
This is the card that I came up with.
The products I used:
Everyday PaperDolls Cartridge - 3.25in
Blossoms Imagine Cartridge - pink paper
Stand & Salute Cartridge - .50in pink ribbon
Gypsy Font Cartridge- .75 in
Spellbinders Nestibilities- scallop oval
Cuttlebug Folder
Viva DecorPearl Pens
We R Memory Keepers Pink Floss
Stampin'Up Whispering White cardstock
Stampin'Up Dimensionals
Peach keen EveryDay Character Faces
Thanks for stopping! Make sure you head back to CTO's blog and check out the rest of the DT's fabulous creations.
I'm also entering this in a few other challenges:
Link Up for Pink Linking party
My Sheri Crafts - Think Pink
And remember ladies... Do your monthly breast self-exams and get in for your yearly Mammograms!!!
Have a great day!
Mary
Saturday, October 1, 2011
Fiskateers Orange Blog hop!
For the trick or Treat Blog Hop go HERE
Good Morning and Welcome!
This is a stop on the Orange Blog Hop where members of Fiskateers, a community sponsored by Fiskars, is sharing their passion for crafting." I am Fiskateer #6811 and am proud to be a part of this wonderful community.
If you have come from Marianne's (6701) blog , then you are in the right spot. If not, and you want to start at the beginning, go to Debby's (2852) blog. and start from there. There will be some awesome projects and some candy along the way, so you will not want to miss a thing.
For my project today I made a petal card. I found this at Splitcoasterstampers and they had a great tutorial on how to make it.
I really love how this card turned. I wanted to have something pop out when it opened and I actually made it work.... I LOVE it when that happens LOL!
Recipe for card:
StoryBook Cricut cartridge- 4- 5in. scallop circles
George & Basic Shapes - 2- 4in circles
Happy Hauntings - 2 - 2in ghosts, 1.5 in. Boo
K&Company Halloween cardstock
Stampin'Up black cardstock
Stampin'Up My Digital Studio- Happy Halloween sentiment
Spellbinders Nestibilities- 2 scallop ovals
Martha Stewart purple glitter
Martha Stewart Scoreboard
Peachy Keen Monster face stamps
Fiskars paper trimmer
My very own hand-crafted spring made from wire I found in the jewelry dept at my LSS.
Thanks for stopping by, I hope you liked my project and have been inspired so far. Now it's time to head on over to the talented Shannon (6394) and see what she has created.
But wait... before you move on we have to have some blog candy, but I have a slight problem. I was going to go pick up some goodies yesterday but a Dr.'s visit in the afternoon ended up being an evening in the ER with my hubby, Kidney stones got the best of him but is doing better So the blog candy will be a surprise, we all like surprises, right??!! Just leave me a comment and a way to get a hold of you , I'll pick a winner on Monday evening.
Have a great day!
Mary
Good Morning and Welcome!
This is a stop on the Orange Blog Hop where members of Fiskateers, a community sponsored by Fiskars, is sharing their passion for crafting." I am Fiskateer #6811 and am proud to be a part of this wonderful community.
If you have come from Marianne's (6701) blog , then you are in the right spot. If not, and you want to start at the beginning, go to Debby's (2852) blog. and start from there. There will be some awesome projects and some candy along the way, so you will not want to miss a thing.
For my project today I made a petal card. I found this at Splitcoasterstampers and they had a great tutorial on how to make it.
I really love how this card turned. I wanted to have something pop out when it opened and I actually made it work.... I LOVE it when that happens LOL!
Recipe for card:
StoryBook Cricut cartridge- 4- 5in. scallop circles
George & Basic Shapes - 2- 4in circles
Happy Hauntings - 2 - 2in ghosts, 1.5 in. Boo
K&Company Halloween cardstock
Stampin'Up black cardstock
Stampin'Up My Digital Studio- Happy Halloween sentiment
Spellbinders Nestibilities- 2 scallop ovals
Martha Stewart purple glitter
Martha Stewart Scoreboard
Peachy Keen Monster face stamps
Fiskars paper trimmer
My very own hand-crafted spring made from wire I found in the jewelry dept at my LSS.
Thanks for stopping by, I hope you liked my project and have been inspired so far. Now it's time to head on over to the talented Shannon (6394) and see what she has created.
But wait... before you move on we have to have some blog candy, but I have a slight problem. I was going to go pick up some goodies yesterday but a Dr.'s visit in the afternoon ended up being an evening in the ER with my hubby, Kidney stones got the best of him but is doing better So the blog candy will be a surprise, we all like surprises, right??!! Just leave me a comment and a way to get a hold of you , I'll pick a winner on Monday evening.
Have a great day!
Mary
Trick or Treat blog hop
Good Morning and Welcome to the Trick or Treat blog hop. I just love Halloween, as a child it was fun getting all dressed up , going out and getting all the candy lol. Now, as an adult I love giving out the candy and seeing all that excitement in the eyes of the little people.
For this hop we're making Halloween projects that pertain to those holiday treats. If you just hopped from Elaine's then you are on the right track,if not, you'll want to head back to Angie's and start at the beginning.
I found my treat holder idea at Splitcoaststampers. I just love this site, I get so many ideas and inspiration there and the tutorials they give are amazing.
I actually made 10 treat holders and each one is decorated a little different. What's nice about these are you could decorate for different occasions.
Some of the products used are:
Happy Haunting Cartridge
Viny
Stampin Up cardstock
Stampin Up "My Digital Studio"
Martha Stewart "Drippy Goo" border punch
Viva decor Red pen liner
Test Tubes from my LSS
Ribbon is from my stash
There are 3 great prizes being offered up and will be drawn Monday evening. You must leave a comment on each blog to be entered into the drawing.
Thanks for stopping by, now head on over to the super talented Wendy and see what she has created.
Have a great day!
Mary
For this hop we're making Halloween projects that pertain to those holiday treats. If you just hopped from Elaine's then you are on the right track,if not, you'll want to head back to Angie's and start at the beginning.
I found my treat holder idea at Splitcoaststampers. I just love this site, I get so many ideas and inspiration there and the tutorials they give are amazing.
I actually made 10 treat holders and each one is decorated a little different. What's nice about these are you could decorate for different occasions.
Some of the products used are:
Happy Haunting Cartridge
Viny
Stampin Up cardstock
Stampin Up "My Digital Studio"
Martha Stewart "Drippy Goo" border punch
Viva decor Red pen liner
Test Tubes from my LSS
Ribbon is from my stash
There are 3 great prizes being offered up and will be drawn Monday evening. You must leave a comment on each blog to be entered into the drawing.
Have a great day!
Mary
Subscribe to:
Posts (Atom)